Complete TallyWhatsApp Setup Guide: From Install to Your First WhatsApp Invoice
This is the end-to-end TallyWhatsApp setup guide: install, activate, pair WhatsApp, verify the TDL hooks, send a real sales invoice, and watch it land on the customer's phone. Every step has a screenshot from a working install. Time to first delivered invoice — about eight minutes.
Before you start
Three things you need on the same PC where you run TallyPrime:
- TallyPrime 4.x or newer. Tally.ERP 9 isn't supported.
- Windows 10 or 11. The connector is a Windows service plus a tray app.
- WhatsApp on your phone. Same handset you'd use for WhatsApp Web.
You'll also want about ten minutes. Most of that is waiting for TallyPrime to restart — the install itself is under a minute.
Step 1 — Buy and download
Head to tallywhatsapp.variantstudio.in and
click Buy lifetime · ₹999. Razorpay handles the payment. Within a minute or two of
success, you'll get an email with your activation key in the format
TWA-XXXX-XXXX-XXXX and a download link to the latest MSI. The thank-you page that
loads right after payment also has the download button — save the file as
TallyWhatsApp.msi.
Step 2 — Install the MSI
Double-click TallyWhatsApp.msi. The installer is signed and asks for elevation
(UAC prompt) because it needs to register a Windows service. Click Yes.
What happens during the install:
- A Windows service called TallyWhatsAppConnector is registered and started.
- The C# COM bridge (
TallyWhatsappsender.dll) is registered with regasm in both 32-bit and 64-bit views so TallyPrime can find it. - Three TDL files (
sales_send.tdl,receipt_send.tdl,ledger_send.tdl) plus a loader land inC:\Program Files\TallyWhatsApp\TDL. - Every
tally.inion the machine is patched withUser TDL = Yesand aTDL =line for each of our four files. - Start Menu and Desktop shortcuts are created with the brand icon.
After install, a tray icon appears near the clock. Click it — the dashboard opens in your default
browser at http://127.0.0.1 on a random local port.
Step 3 — Activate your license
On the dashboard, find the License panel. Paste your TWA-XXXX-XXXX-XXXX key
and click Activate. The connector verifies the Ed25519 signature offline — no phone-home —
and the panel flips to Activated · pro.
Each license includes one device activation. If you ever need to move to a new PC, just paste the same key there. If you ever need to move it, email admin@variantstudio.in and we'll reset the count.
Step 4 — Pair WhatsApp
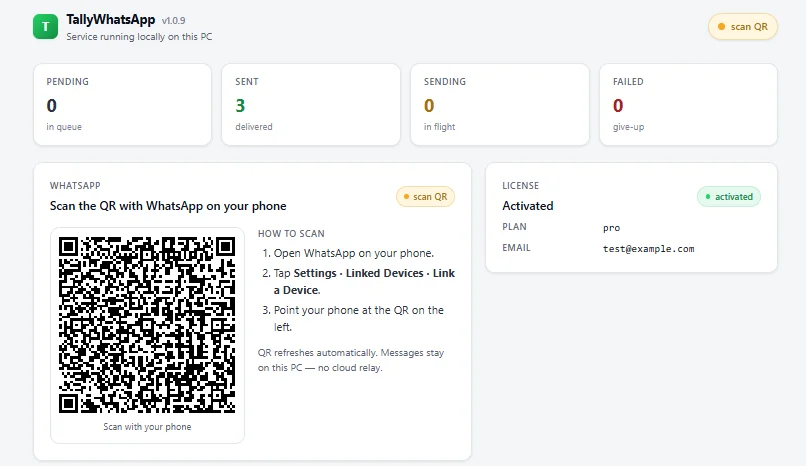
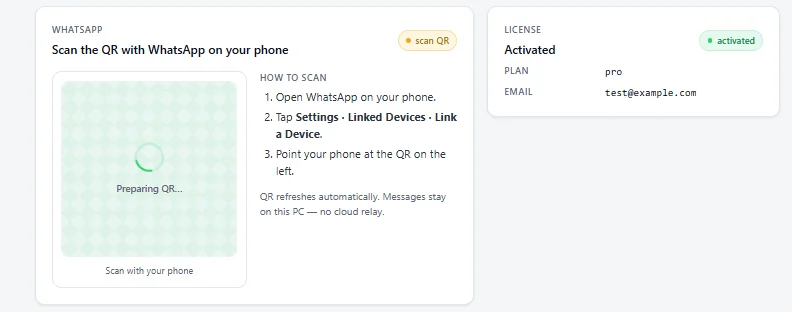
The WhatsApp panel on the dashboard shows a QR code. On your phone:
- Open WhatsApp.
- Tap Settings → Linked Devices → Link a Device.
- Point the camera at the QR code on the dashboard.
- Wait a couple of seconds. The dashboard's WhatsApp panel should switch to Connected and show your phone number.
This is the standard WhatsApp Multi-Device pairing — the same flow you'd use for WhatsApp Web. Your phone stays the source of truth; TallyWhatsApp is just a linked device.
Step 5 — Verify TDL hooks loaded inside TallyPrime
Restart TallyPrime so it re-reads the patched tally.ini. Then press F1
→ TDL & Add-On → TDL Configuration. You should see four files
from C:\Program Files\TallyWhatsApp\TDL, all set to Yes:

If any of them shows Not loaded (Error), the most common cause is that TallyPrime is still running an old session. Close TallyPrime fully (check the system tray for a hidden Tally icon) and reopen it. If the error persists, see the troubleshooting section at the end.
Step 6 — Send your first sales invoice
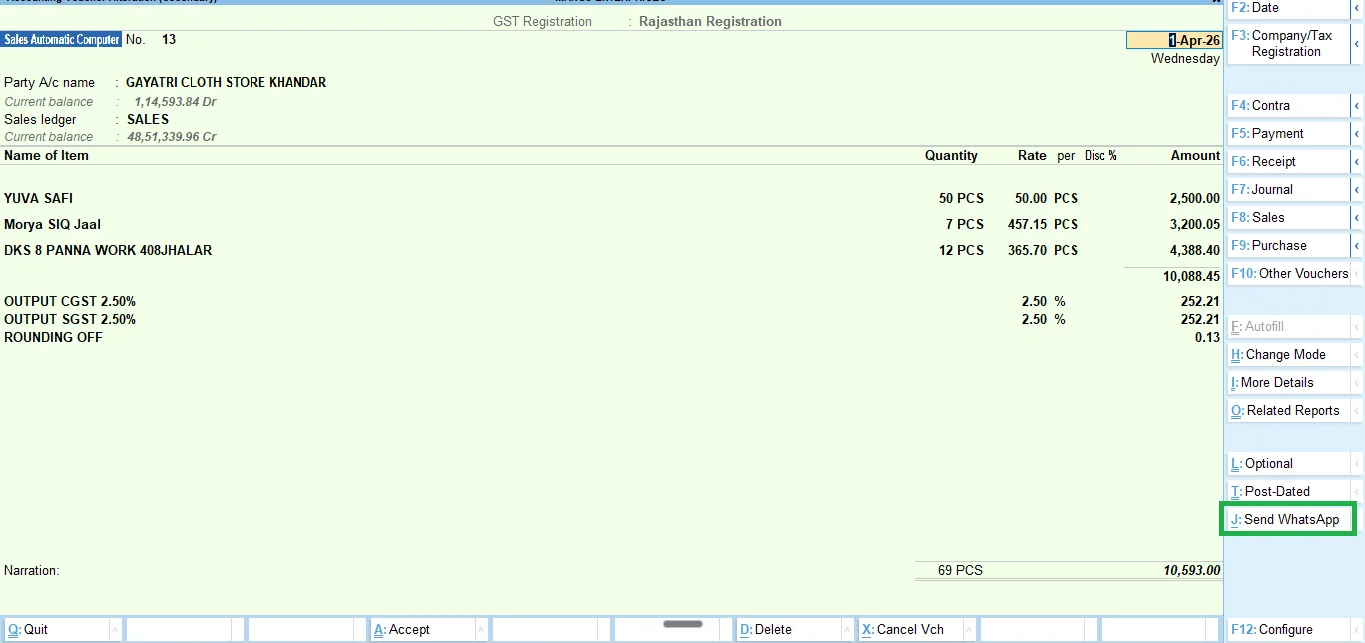
Open any sales voucher in TallyPrime and look at the right-side function-key panel. You should see a new entry: J: Send WhatsApp.
Enter (or open) a sales voucher for a customer whose ledger has a phone number on file. Save the voucher with Ctrl+A as you normally would, or press Alt+J to fire the WhatsApp flow without saving.
Step 7 — Confirm the send
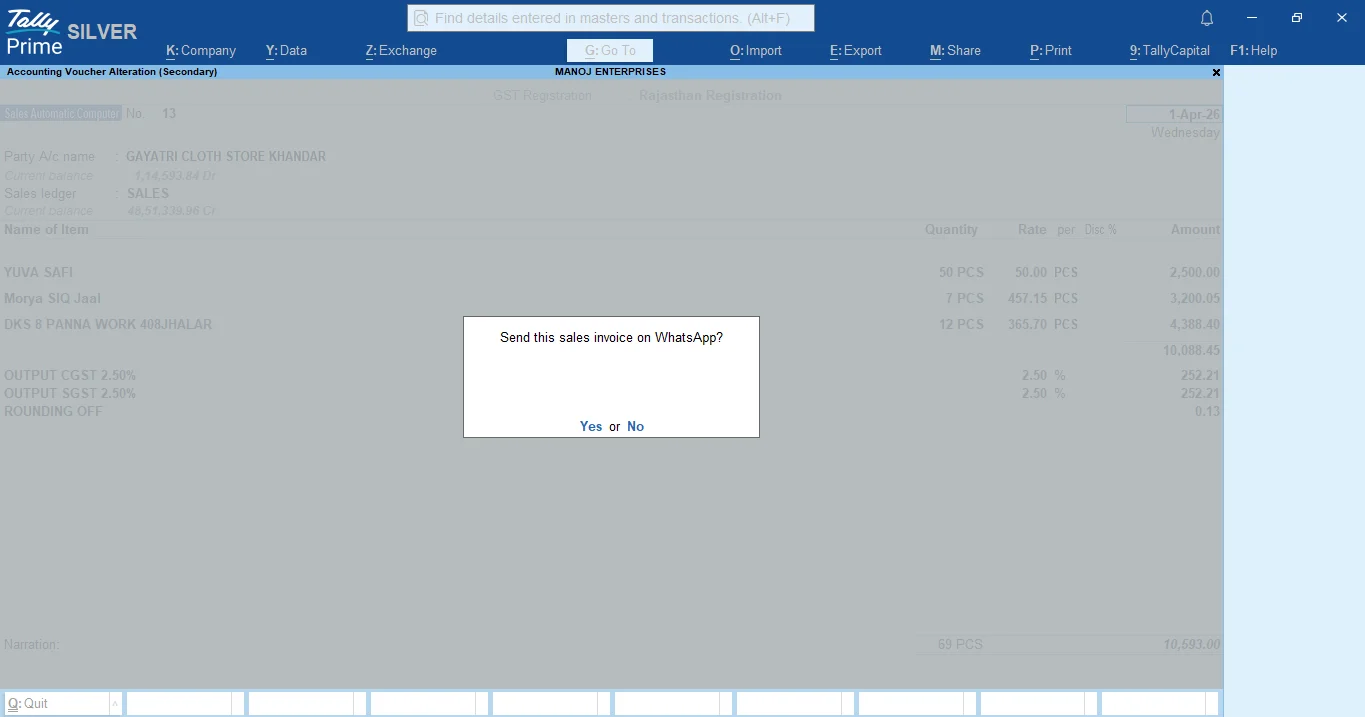
A small TallyPrime dialog appears asking Send this sales invoice on WhatsApp? with Yes/No buttons. Press Y.
This Yes/No prompt is the only confirmation. Press Yes and you've explicitly told the system to send. Pressing Yes again later — even on the same invoice — is treated as a fresh send. That's the design: the user confirms, the system delivers.
Step 8 — Watch it queue
TallyPrime exports the voucher as a PDF, hands it to the connector through the COM bridge, and you see a brief confirmation: Queued. WhatsApp delivery runs in the background. Press any key to continue.
The connector now picks the item off its durable BoltDB-backed outbox, talks to WhatsApp's Multi-Device protocol, and uploads the PDF. If WhatsApp is down or your network drops, the queue retries with exponential backoff — you don't lose the message.
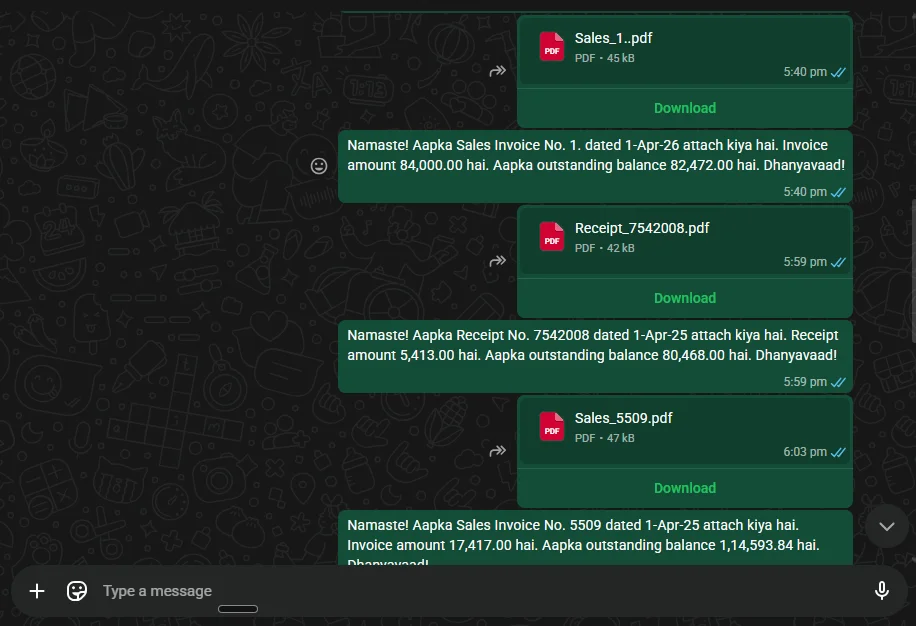
Step 9 — Customer receives the PDF
Within a few seconds, your customer's WhatsApp shows the invoice PDF with a friendly Hindi-English caption: Namaste! Aapka Sales Invoice No. … attach kiya hai. Invoice amount … hai. Aapka outstanding balance … hai. Dhanyavaad!
The same flow works on receipt vouchers (also Alt+J) and on the Ledger Vouchers report (Alt+L for the Send Ledger WA button). For more on each voucher type, see how to send Tally invoices on WhatsApp automatically.
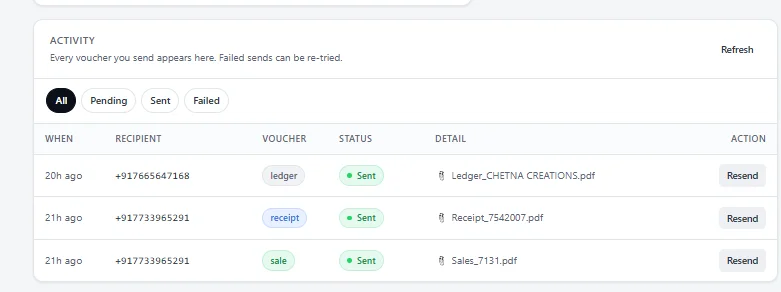
Step 10 — Track everything in the activity log
Back on the dashboard, switch to the Activity Log. Every send appears there with a status badge — Sent, Sending, Pending, Failed — the recipient number, voucher type and a Resend button.

Resend is per-row. Click it and the voucher re-enters the queue. There's no daily quota and no cooldown except for receipt vouchers, which are spaced about 90 seconds apart so end-of-day batches don't trip WhatsApp's anti-burst limits.
Troubleshooting: QR stuck on "Preparing"
The most common first-install hiccup. The dashboard says Preparing QR… but no code ever appears.
Open PowerShell as Administrator (right-click the Start menu → Terminal (Admin) on Windows 11, or Windows PowerShell (Admin) on Windows 10) and run:
Restart-Service TallyWhatsAppConnectorRefresh the dashboard. A fresh QR code appears within a few seconds. This usually only happens after a Windows sleep/wake or a forced shutdown that left the connector mid-state.
What's next
That's the full TallyPrime WhatsApp setup. The connector now lives in your system tray, restarts itself if it ever crashes, and updates daily via a scheduled task that pulls the latest MSI signature. You don't have to think about it again.
If you want to understand the TDL plumbing under the hood, read the Tally TDL tutorial. If you want to know where else to apply the same automation thinking, the Tally automation checklist is where most teams go next.
Get TallyWhatsApp running today
₹999 one-time. One device activation included. Data stays on your PC. Eight minutes to your first delivered invoice.
Buy lifetime · ₹999